Today I am going to tell you the five steps to make a perfect weld seam in a generalized way without considering the different positions, electrodes, and materials.
Although I am a proponent of electrode welding, the steps I will explain in this entry apply to all types of welding techniques.
It may seem difficult, but as I say, again and again, it is only technical and practical.
Remember that repetition is the mother of mastery.
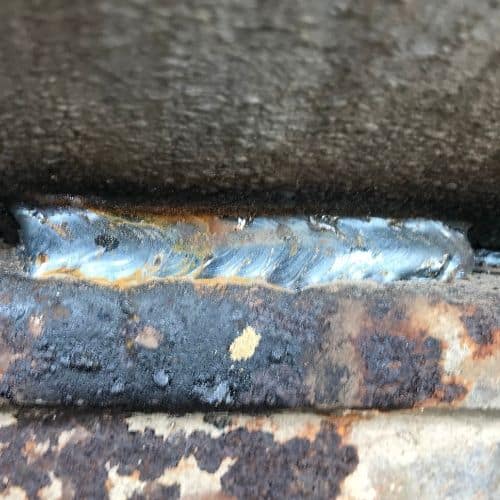
What is a perfect weld bead?
Contents
Well, it is a bead with good mechanical characteristics and good presence in general features.
Now, you have to assess the extent to which you need a perfect weld bead. This is something that is not detected by the naked eye, for it there are several techniques to verify its quality (ultrasound, X rays, penetrating liquids, etc.).
100% quality beads with no porosity are required in high-quality joints used in industries such as nuclear power plants, combined cycle power plants, petrochemicals, gas pipelines, etc. And yes, you need to be certified to weld such important details.
In addition, they are unions that require thermal treatments to give it a good finish with the necessary strength characteristics (to release the tension caused by rapid heating and cooling process).
To make decent welds, you have to practice, it is not easy, here are some guidelines you can follow.
Is it necessary to make good weld seams?
YES, the better it is, the stronger it will be. I guess that’s what you’re looking for, isn’t it?
If so, here I show you the five important points for you to approach and get it with time and good practices.
A word of advice: Try to learn good welding habits, the bad ones cost a lot to fix.
5 steps to make a perfect weld bead
# 1 Good preparation of the materials to be welded
Clean the surfaces before you start welding!
This step is the most important, simply because it is the first. If you skip it, especially with MIG and TIG welding, you lose strength and the quality right off the bat.
Apply it and give it the importance it deserves, if you do it well you have earned 20% of the quality of finish.
I’m not going to explain again what I dedicate an entire post with video included because it would be repeating information. What I am going to do is put the link of the article here
# 2 Select appropriate filler metal
I’m not going to complicate you too much here. The first thing you need to know is what kind of material you are going to weld.
It is not the same to weld joints that are not going to suffer stresses from various machines or opposing resistances as is the case of agricultural implements than to make a steel drawer or door.
On this subject, I made another post to help you make decisions when choosing the type of MIG filler wire.
Watch out, you don’t need to be an expert! Just know what you are welding. The salesperson will help you with the rest.
# 3 Current intensity regulation
You have to take the trouble to regulate the power with which you are going to weld. This point is also very important as it will determine the quality of the weld bead so to speak.
Each electrode, position (horizontal, vertical, cornice, under roof, etc.) welding machine, materials to be joined need different amperage.
For this, it is appropriate to make a series of tests on a piece of material that is not useful before making the real welds, especially if you are just starting out as a hobby welder.
It is worthwhile to stop at this point and make good current graduation to have a good fusion of the materials to be joined.
At this point, I’m not going to extend either since you also have an entry available on this blog here.
# 4 Distance and angle of the electrode to the weld joint
So here I’ll tell you the same, it is super important that you maintain a proper distance and angle for the proper execution of the weld.
All points are really important because if you don’t execute well you are losing 20% or more of finish quality.
With a correct application, this spot is a piece of cake, very easy. At the moment you have a basic concept you will see with a little practice that was no big deal.
I know you’re thinking “you have an entry that explains it”. Affirmative, It’s here
# 5 Right shielding gas
This is the last but equally essential, just as important as the others.
You know that on a three-legged stool, all of them are important. If any of them fails, the stool collapses, because exactly the same thing happens here.
If you fail in any of the points the normal thing is that the cord does not remain as you expect with acceptable quality.
Do not be afraid that this point is not difficult either, you just have to follow a few guidelines and over time is automated and comes out well even if you do not want, is like driving a vehicle that sometimes you have to question yourself. The same thing happens with welding.
Here is a post on how to choose the right shielding gas for your job. Most of the times just CO2 does the job, but if you are welding more delicate materials like aluminum or stainless steel, more exotic gases are needed.
In short
What I’m trying to do is explain to you and make you aware that all the points are important on their own. The moment you skip any of them you will be losing a lot of quality and not only that, but it will also take longer to do the same even if you think otherwise.
Doing or trying things right the first time is to gain a lot in productivity, I know you won’t get it the first day, it’s logical, we all happen. But if you follow a method or system you will end up doing very well.
Don’t get discouraged and persist. You’ll make it, I encourage!
And since it happens to all of us, be careful with the welding rays and don’t burn your eyes, safety first! it’s very annoying when the eyes feel like you have sand in the eye. But as it is normal that it can happen to you (to me also in spite of the years of practice)
I’m sure you have some doubts or suggestions. Cheer up and tell me what you want to know in the comments and I will try to help you.
You can also read more about nice MIG welds and porosity here.